Client-Core SSL support
If you wish to setup an SSL connection between the core and client, you must have compiled both with the "-DWITH_OPENSSL=ON" cmake option.In case you use a binary version, verify that it was built with SSL support.
- The Windows binary distribution supports SSL out of the box. See Windows notes at the bottom.
You don't know where to look for whether SSL support is available in your core?
Start your core once and look out for warnings in /var/log/quassel/quasselcore like:
Warning: SslServer: Certificate file /home/quassel/.config/quassel-irc.org/quasselCert.pem does not exist
Warning: SslServer: Unable to set certificate file
Quassel Core will still work, but cannot provide SSL for client connections.
Then you need to generate a certificate file to be used for the connections.
LetsEncrypt
You can either update the existing certificate file Quassel uses by default:
cat /etc/letsencrypt/live/example.com/{privkey.pem,fullchain.pem} > /var/lib/quassel/quasselCert.pem
Or use command line arguments like
--ssl-certand
--ssl-keyand point them at the LetsEncrypt folder, you might have to give Quassel core's user access to the files. Running as root shouldn't be the solution.
Self-signed certificate
As the user that starts quassel-core, issue something like the following command on the server running the core:
>=Version 0.4
openssl req -x509 -nodes -days 365 -newkey rsa:4096 -keyout ~/.config/quassel-irc.org/quasselCert.pem -out ~/.config/quassel-irc.org/quasselCert.pem
You might use a different configuration directory. Check if your core gets started with the --configdir command-line option.
Note that Kubuntu packages for Jaunty (9.04) and later do this step for you.
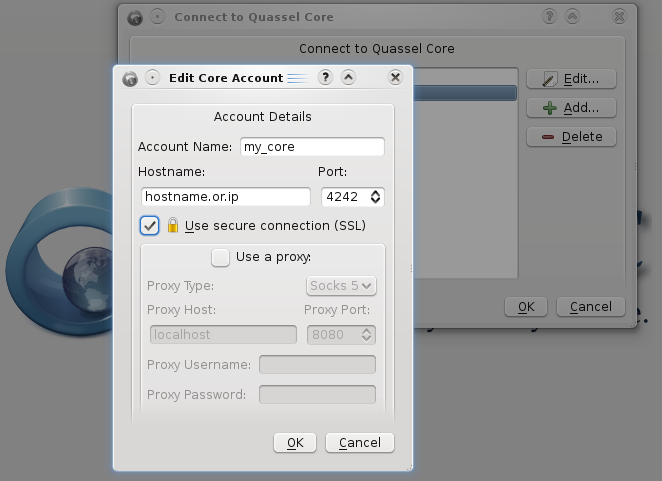
Start the core and select SSL in your Client as shown below:
Creating a certificate on Windows:
- Download Open SSL for Windows . I used the Win32 OpenSSL v1.0.1c Light version, but other/later versions will work too as long as your system supports them. Don't forget to also download the relevant Visual C++ redist from that page and install it first. When installing OpenSSL, I chose to install the OpenSSL DLLs to the OpenSSL directory (not to windows directory), but it SHOULD work either way.
- Open a command prompt, navigate to the openssl bin directory (typically
cd c:\openssl-win32\bin), then issue the following command:openssl req -x509 -nodes -days 365 -newkey rsa:4096 -keyout %APPDATA%/quassel-irc.org/quasselCert.pem -out %APPDATA%/quassel-irc.org/quasselCert.pem -config openssl.cfg
(Note that the only difference from the *nix command is the target directory for the cert (typically results inC:\Users\<USERNAME>\AppData\Roaming\quassel-irc.org) and the config file for OpenSSL which uses the sample config at the OpenSSL bin directory (openssl.cfg). If you installed the OpenSSL DLLs to the windows directory, your sample config file might be there.)
If the above command does not work, try removing-config openssl.cfgfrom the end of the command. This was required to generate a certificate on v1.1.1g Light of OpenSSL.
If you still get errors. Try removing%APPDATA%/quassel-irc.org/from the paths. After the file has generated (intoc:\openssl-win32\bin), manually move it to the proper location in%APPDATA%/quassel-irc.org/. - Fill in the details for the certificate generation (pressing enter for all will also work), and now core should have its certificate ready for encrypted communication with the clients.
Certificate chains
If you happen to have a certificate chain with intermediate certificate authorities (CAs) then you need a specific structure for quasselCert.pem. If you do not know what an intermediate CA is, check with your certificate issuer. If you followed the instructions above, you do not have an intermediate CA and do not need these instructions.
Your CA should provide you with all intermediate CAs required to complete the chain from your certificate to the root CA. To make this chain work with quassel, make sure the file has the PEM encoded objects in the following order:
- Your certificate as issued by the CA
- The intermediate CA that signed your certificate
- The intermediate CA that signed the previous CA
- ... and so on and until you have the intermediate CA that is signed by the root CA
- Your private key
Note that often you only have one intermediate CA so your file looks like this:
- Your certificate
- Intermediate CA
- Your private key